Welcome to the place all about tinywhips aka FPV (first person view) RC cars and trucks. In this post we are going to go over the basics which is budget friendly units, parts and mods. How to build and what not to do.
Here is an example of a tinywhip in the 1/28 scale range.
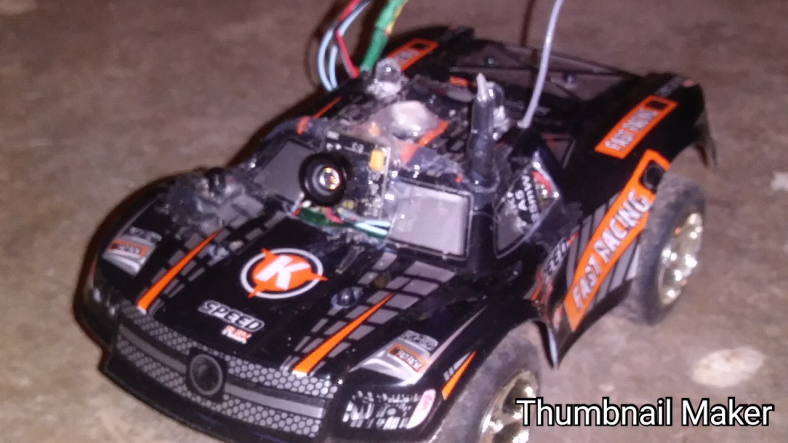
Here is one in the 1/30 scale range.
Both are fairly budget friendly units but come with built in batteries and not many parts for upgrades. Lack of upgrade parts are compensated with stock parts available online or old units you may have of same or similar model.
All a tinywhip consists of:
- FPV camera
- VTX (video transmitter)
- Primary or secondary power source for FPV
- Cooling fan (if necessary)

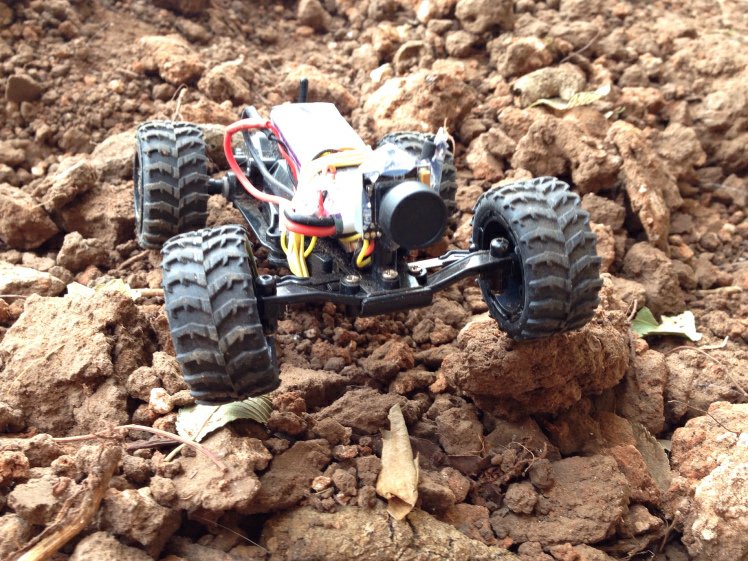
You can see in the pictures above its just a camera, VTX (split AIO VTX) and a separate battery. This unit is in the 1/36 scale range. Built in battery that will ultimately be removed.The camera used was the AKK A5 AIO (all-in-one) split VTX
What not to do:
- Do not mount things so they are exposed in rolls and flips. Like cameras and vtx mounted on the roof outside of canopy.
- Do not leave battery exposed in rolls and flips. If punctured it could catch on fire.
- Do not position things to where weight isn’t distributed properly. Check CG! (Center of gravity – even if you don’t believe in gravity.)
- Do not run through mud, puddles, rain or anything of the sorts without putting a conformal coating on your electronics. (Helps with protecting from dirt and sand too)
Okay, lets get started!:
First you want to pick what kind of car or truck you desire. Take into consideration your desired driving behavior, where you will be at and where you would like to go.
Many classes to choose from.
But we will start with simple in this post. For a list of vehicles to get other ideas from, please click here.
Find your unit and assess whether it needs a battery mod or not. If you aren’t mentally prepared for such mods the options are. Internal batteries built in that you charge from an outside plug. Requiring no additional chargers other than what’s provided.
Most likely a USB cable with a small plug for the unit.
Or you can get other RTR (ready-to-ride) units that have a charger included for the external battery included with the unit.
My recommendation is to not let fear take the wheel and steer. Don’t worry about messing up anything. The hobby is worth it. The fun is worth it!
Think of a real life Mario Kart experience with your friends.
Now that you have your desired unit, take the canopy off and study it. See what the best placement would be, how much room you have to work with.
I recommend mounting your camera in a cutout in the windshield. Giving a real life experience of being in the drivers seat. Seeing the hood as if you were really there.
Here we have the wltoys L939 unit with a 3 cut flap on the windshield folded inward to mount the camera to.

And a 3 cut flap for a battery to slip in from the rear. Which we will get to soon enough.
I would use a dab of hot glue to hold the camera in place. Then using a toothpick or something else. Slather E6000 around the edges of the camera and the plastic you’re mounting to.
Hot glue will only hold for so long. E6000 works best after curing for at least 12 hours. If you allow an hour or so of curing. The hot glue should hold it in place but I will recommend letting the E6000 do its job. The patience will pay out.
I built a little roll cage for my camera.


Paper clips and a nail bent to desired shape. The red one is an aluminum crochet needle.

Now if you have chosen an AIO FPV camera like this AKK a1-osd which has the vtx built onto the camera. Disregard this next step.
If you have a split AIO or separate VTX like Oscars backpack VTX then follow next step.
Finding the appropriate distance from camera and position. You can use standoffs or make a spacer for it to breath. Especially if not using a cooling fan.

Here we have a hole poked into the roof of canopy to allow vtx antenna to slip through and point upward. Vtx was mounted on side wall of canopy with a cutout to expose part of it for a cooling fan.

That’s a 40mmx40mm fan which is a little big. I recommend something like this 15mmx15mm fan.
Okay, so once we have the camera setup with a VTX. You can now decide wether you’re going to run an external battery for just FPV and run on the internal battery to power the car itself.
Or doing a battery mod and making a wiring loom (wiring harness) for everything to tie into, FPV, cooling fans and anything else you decide to add. Like headlights, tail lights, police lights for cop and robber games with your friends.
Think about it. Red and blue for cops, orange for the robbers flashing on the roof to distinguish one another through FPV.
I recommend hooking cameras and VTX via small ph1.25 connectors.
Do connections from the battery to the AIO (all-in-one) RX/Esc via large connectors called PH 2.0
Although most the decent batteries out there are PH 2.0, there is nothing wrong with adding multiple connector types to allow an amplitude of batteries that are available. But remember, the farther electricity travels the more you lose in transit.
Once decided on the power source for both units, you are set!
The simplest and fastest way to get driving with fpv is to use the internal battery to power the unit and an external power source for power to the vtx. Generally the camera gets power from the vtx.
For units with external batteries like the Q39, external 1s lipos will power your vtx and camera. But I would ultimately recommend getting a voltage regulator (step down) for 2s lipos to 5v. Or step up to 5v from 1s.
Well guys and gals, this concludes this guide. Please feel free to contact me with any questions. For a recommended parts list click here.
I do this for free, so links I use are affiliate links to help support what I do. Please check out my YouTube channel for all sorts of RC related stuff. 3D printing coming soon….
Extra videos:

Reblogged this on FPV Outlaw.
LikeLike